Tag: paleo
WEEKNIGHT PALEO CHICKEN NUGGETS WITH HONEY MUSTARD
- Chicken nuggets:
- 2-3 chicken breasts, about 1.5 lb
- 1¼ cup blanched almond flour
- ½ cup cassava flour
- 1 teaspoon garlic powder
- ½ teaspoon cumin
- ½ teaspoon onion powder
- 1 teaspoon paprika
- 1 teaspoon oregano
- ½ teaspoon salt
- ½ teaspoon ground black pepper
- 2 eggs
- Honey Mustard Dipping Sauce:
- ½ cup mayo (this is the brand I like)
- 2 teaspoons stone ground mustard (this one is my favorite)
- 2 teaspoons raw honey
- ½ teaspoon lemon juice
- Preheat oven to 400.
- Slice chicken in evenly into 1-inch squares. Trim off any excess fat and set aside.
- In a large zip lock bag, combine almond flour, cassava flour and all dry ingredients.
- Seal bag and shake until well combined.
- In a small bowl, crack both eggs and mix well.
- Dip chicken nuggets into egg mixture a few at a time, making sure they are coated liberally before dropping into the zip lock with dry ingredients.
- Once all chicken nuggets are added to the bag, seal bag and shake until all chicken is coated well.
- You may need to open the bag a couple of times to check, which is fine. Just make sure each piece is covered in the batter.
- Once fully covered, place nuggets on a parchment-lined cookie sheet. You may need two of these. Nuggets can be close but make sure they don’t touch.
- Place into the oven and cook for 20 minutes total, flipping halfway or when nuggets begin to brown.
- The trick here is to cook them so that they are done and crispy, without over cooking them and drying out the chicken. Check after 7 minutes as all ovens vary and flip early, if necessary.
- While nuggets are in the oven, combine all honey mustard ingredients into a bowl and mix well.
- Remove chicken nuggets and allow to cool for a few minutes before serving with honey mustard.
Nut-Free Coconut Chocolate Chip Cookie Bites
1 1/2 cups of hulled pumpkin seeds (also called pepitas)
1/2 cup mini dark chocolate chips (these are the ones I used)
1 1/2 cups dates, pitted
1/8 teaspoon finely ground sea salt
2 tablespoons water
1/4 cup shredded coconut for rolling (optional)
DIRECTIONS:
1. Pour hulled pumpkin seeds into your food processor and run until finely ground. Pour into a medium bowl and set aside.
2. Place the pitted dates in the (now empty) food processor and run. Make sure you evenly distribute the dates in the food processor. Dates are taxing on food processors and we want not make the job harder on this beloved (and needed) appliance. Run until the dates are well chopped and form a ball in the food processor. Now, brace yourself. This step might cause your food processor to shake. Just hold it down with your hand for your own peace of mind and it’ll all be over in a minute or two.
4. Once the dates have formed a ball in your food processor, add the pumpkin seeds, chocolate chips, and sea salt to the food processor and run until everything is well combined. You may need to scrape down the sides of the food processor and run it again to make sure everything gets mixed in.
5. The mixture may appear crumbly. Using clean wet hands (this helps the date batter from sticking to you) smoosh and roll the date mixture into golf ball sized bites. Arrange them on a plate or cookie sheet. If the mixture is too crumbly to form balls easily, add the water to the food processor and run again to help the mixture be sticky enough to hold together.
6. Once done rolling the bites, pop them into the freezer for an hour to harden up a bit. After, you can garnish them by rolling them in shredded coconut, but this is an optional step!
7. Store in an air-tight container for 7 days in your fridge or freezer.
PALEO PRETZEL DOGS
- Paleo Soft Pretzel Recipe
- 5 Applegate Farms Organic Grass Fed Hot Dogs
- Make the Paleo Soft Pretzel recipe and instead of rolling the dough into pretzel shapes wrap around the hot dog as shown.
- Bake at 350 degrees for 35 – 40 minutes
- Enjoy!
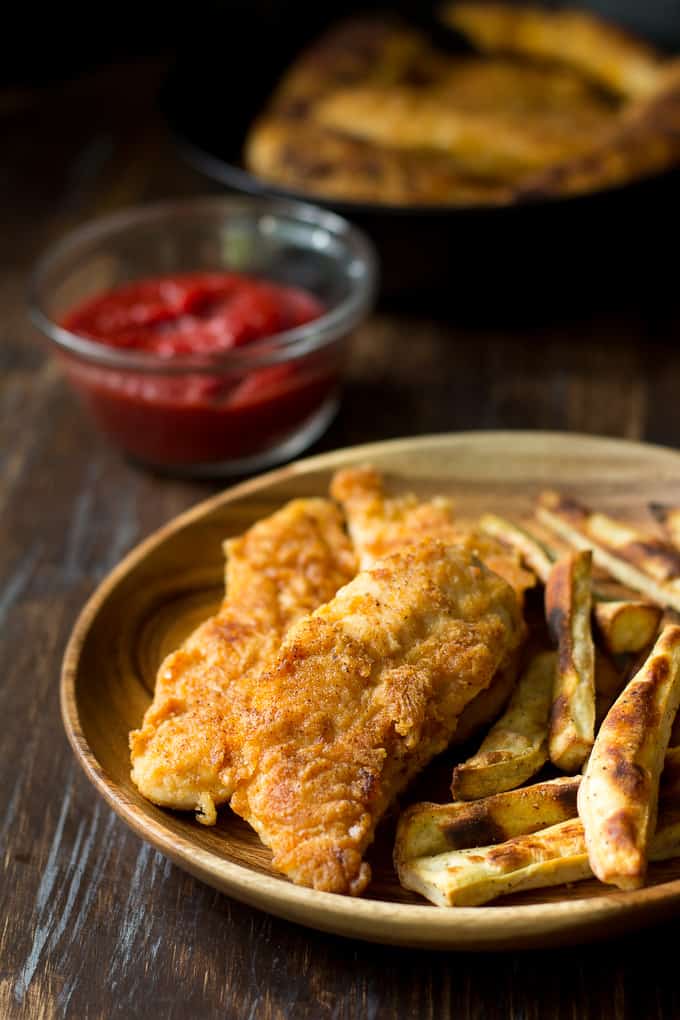
CRISPY PALEO CHICKEN TENDERS
- 1.5 lbs chicken tenderloins, organic, sliced evenly
- 1 egg, whisked
- ¾ cup Cassava flour*
- ¼ cup Coconut flour*
- 2 tsp fine grain sea salt
- 1 tsp onion powder
- 1 tsp smoked paprika
- ¼ tsp black pepper
- ¼ cup plus up to 2 tbsp more of cooking fat – refined coconut oil, light olive oil, or your preference
- In a large bowl, combine the cassava flour, coconut flour, salt, and spices. In a small bowl, whisk your egg. For this recipe, you will be coating the chicken in the egg, then grain free flour/spice mixture, and then pan frying.
- Heat a large, heavy skillet over medium-high heat and add your cooking fat of choice**
- Test the oil by dropping in a tiny bit of the breading to see if it sizzles. Adjust your heat accordingly.
- Begin to dredge each chicken tenderloin in the whisked egg, followed by the flour mixture. Shake off excess and add to the skillet, repeat until the skillet is filled up***
- Cook on one side until golden brown and crisp, then carefully turn each one over to cook the second side. Add up to 2 tbsp more cooking fat if necessary, and adjust the heat either up or down for even browning.
- Once both sides are evenly golden brown and the middle is cooked through, transfer the chicken tenders to a baking sheet lined with paper towel to drain excess oil.
- Repeat the process for the remaining chicken tenders, adding more oil and adjusting heat if necessary.
- Serve hot with your favorite dip. Enjoy! Leftovers can be stored in the refrigerator for up to 3 days, and reheated in the oven to retain the crispy exterior.
**For best results, I recommend either refined coconut oil or light flavored olive oil
***You can fry the chicken in batches if your skillet isn’t large enough to accommodate.
PALEO CALZONE
- Dough
- ½ cup of coconut oil
- ½ cup of water
- ½ teaspoon of sea salt
- 1 cup of Tapioca Flour
- ½ cup of coconut flour
- 1 egg
- 1 egg white (save yolk)
- ½ teaspoon garlic powder
- ½ teaspoon of oregano
- Filling
- Pizza Sauce, Applegate Pepperoni, etc (get crazy)
- Place the coconut oil, water, sea salt and spices in a small pan and bring to a boil.
- Remove from the stove, add in the tapioca flour and mix.
- Let this cool for 3- 4 minutes and then add in the coconut flour, egg and egg yolk.
- Mix and then knead for 1 minute.
- Roll out the dough into 3 balls. Take one ball and place between two sheets of parchment paper into roughly a 4″ x 7″ rectangle that is ¼” – ½” thick.
- Make sure you can flip it in half without it breaking completely (there will be small breaks). If it has too many cracks make it slightly smaller.
- Fill with your choice of toppings.
- Flip in half. Pinch closed. To repair any cracks, pinch the dough off one of the balls and use it to do this.
- Repeat.
- Pick up the piece of parchment paper with the Calzones in place and move to a stainless steel baking sheet.
- Beat the egg white you saved and brush it over the top of your two Calzones.
- Bake at 350 degrees for 35 – 40 minutes.
- Eat!
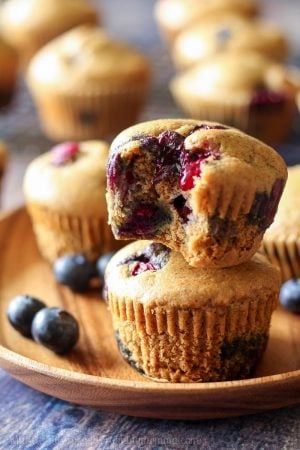
SIMPLE PALEO BLUEBERRY MUFFINS WITH ALMOND BUTTER
Simple Paleo Blueberry Muffins – Grain Free and Dairy Free (source)
- 3 large eggs
- 1 cup creamy almond butter, unsweetened, stirred
- ⅓ cup + 1 tbsp pure maple syrup*
- 1 tsp pure vanilla extract
- ¾ cup blanched almond flour
- ⅓ cup tapioca flour
- 1 tsp baking soda
- ⅛ tsp fine grain sea salt
- ¾ cup fresh blueberries
- Preheat your oven to 350 degrees and line a 12 cup muffin pan with liners (I used these) for easy removal.
- In a large bowl, whisk together the 3 eggs with the almond butter until smooth, then whisk in the maple syrup and vanilla.
- In a separate bowl, combine the almond flour, tapioca flour, baking soda and salt. Stir this mixture into the egg mixture until you have a fully combined batter, then stir in the blueberries.
- After the blueberries are stirred in, spoon or pour the batter into the lined muffin pan to fill each cup about ¾ full to make 12 muffins
- Bake in the preheated oven on the middle rack for 15-20 minutes or until the tops are lightly browned and a toothpick inserted into the center of one comes out clean.
- Allow to cool in the pan for a few minutes before transferring to wire racks to cool completely. Enjoy!


